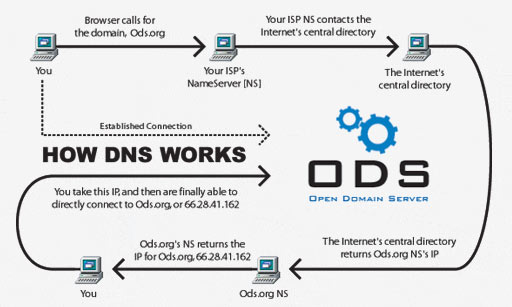
Dynamic DNS is a system for allowing an Internet domain name (something.com) to be assigned to a dynamic (one that changes and is not always the same) IP address. Since the dynamic IP address changes, Dynamic DNS makes it possible for other computers on the Internet to establish connections to that machine without needing to know the actual IP address.
There are many service provider avail Dynamic DNS service, and one of them mentioned here as free:-
The IP address is tracked using No-IP.com’s Dynamic Update Client (DUC) software. When the address change, the DNS record is automatically updated and connections made to the domain name get sent to the correct IP address regardless of what it’s changed to.
Free Dynamic DNS Step by Step configuration
Are you trying to set up a website, FTP server, mail server or any other type of online service? Do you want people to be able reach it via the Internet? Does your ISP only give you a dynamic IP address (one that changes from time to time and is not static)? Here are a few simple steps to follow to get yourself setup and online using No-IP’s free dynamic DNS service. This will allow you to run your servers at your home or business without a static IP address.
Step 1: Create an Account
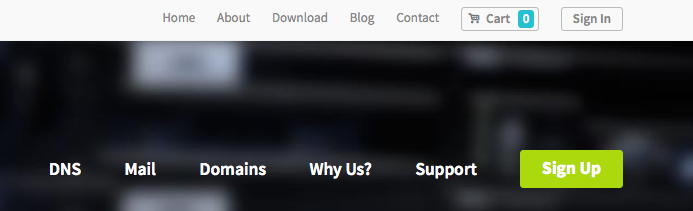
To create an account with No-IP simply click the “Sign Up” link at the top of the page, or click here. Fill in the required fields on the new account form. Please note that our Terms of Service requires valid contact information on file in order to maintain your account with us. Any accounts found with incomplete or fraudulent information will be terminated.
Once you’ve filled in the required information and agreed to our Terms of Service, click the “Free Sign Up” button at the bottom of the page.
Step 2: Confirm Your Account
Once you have submitted your account information into the sign up form, we will send a confirmation email to the address you provided. You will need to check that account and look for an email from No-IP. The email contains a link you must click in order to confirm your account.
(Yahoo and Hotmail customers please click here)
Step 3: Sign In to Your Account
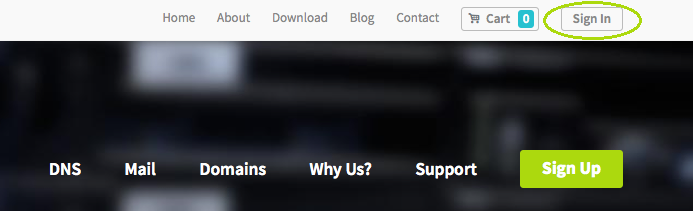
Now that you have confirmed your account, you can Sign In. On the top of the No-IP home page click “Sign In”, at the very top right of the page. You will then see an area to enter your email address/username and password. Enter the information that you signed up with and click “Sign In.”
Step 4: Add a Host or Domain to Your Account
You should now be logged into the No-IP members section. When you registered for a No-IP account a hostname should have been created automatically. You will use this to connect to your server. If you would like you can create another hostname using the steps below.
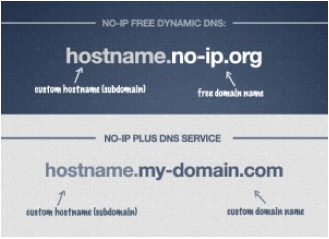
A hostname is used instead of your IP address whenever you want to connect to a service at your location. Hostnames take the form of hostname.domain.com. This means they are the same as names used in URLs to surf the web.
For example, if you were to run a webserver, and you wanted to connect to your server using a web browser, you would put http://hostname.domain.com in the address bar. Hostnames can be used for much more than that however. You could also use the same hostname, without http://, to connect to your desktop remotely using software like Windows Remote Desktop.
Running an FTP server? You can use a No-IP hostname for that as well. Either put the hostname directly into your FTP client or, if your browser supports it, put ftp://hostname.domain.com into the address bar of the web browser and you will be able to make a connection.
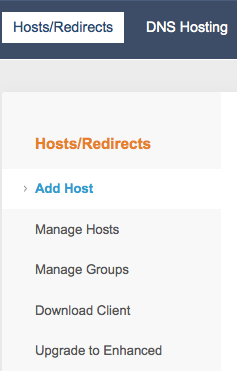
In order to add a host to your account, select the “Add Host” link from the “Hosts/Redirects” menu. This will bring up the “Add A Host” page.
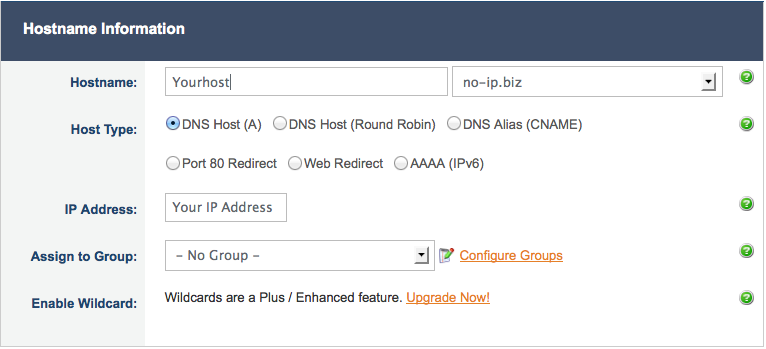
Now you’re ready to fill in the details of your new hostname. Do the following steps to complete that process.
• Fill in the Hostname box with a name of your choosing. It can be anything you like. If you choose a name that’s already in use, an error will be generated and you can then try a different hostname.
• Choose the the Host Type. The default choice, DNS Host A, is usually the correct one. Do not choose any of the other host types unless you’re trying to solve a particular problem that a DNS A record won’t accommodate. If your ISP blocks Port 80 for example, and you’re trying to run a webserver or other service on port 80, then you can choose Port 80 Redirect (at that point you’ll be asked to specify the port to use for the redirection). If you’re not running a webserver, then do not choose this option as it will likely prevent you from connecting properly.
• In the field marked IP Address you should see your current IP address. If you wish to set the IP address of the host to be somewhere other than your current location, you can enter that address now.
• The next two options aren’t used for a basic account setup so we won’t concern ourselves with those in this article.
• When you have filled in the information for your new hostname, simply click the “Add Host” button at the bottom of the page to save it.
If you wish to use No-IP to manage hosts and/or perform dynamic DNS functions for your own registered domain name (yourname.com) you can add a domain to the system. Simply select “DNS Host” along the top dark blue bar, then click “Add My Domain.” There are certain advantages to using No-IP Plus so you may want to take a look at our product comparison page to see those benefits. When adding your own domain, please follow the onscreen instructions.

Step 5: Making Your Host Dynamic
Now that you have added a host or domain into your account, we have to deal with the dynamic IP address problem. Note: If your ISP assigns you a static IP address, you can skip to Step 6.
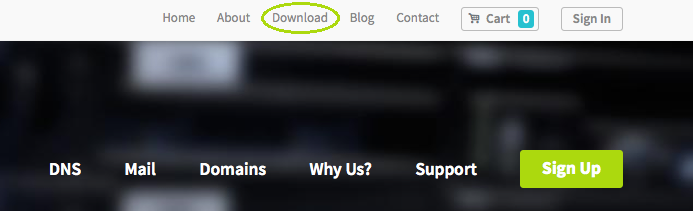
If you have a dynamic IP address, you’ll need to install No-IP’s Dynamic Update Client (DUC). This is free software available from the downloads section of the site.
Note: Detailed instructions for installing the Windows and Linux versions of our DUC software are available in the Guides & Tips section of our site.
After installing the DUC, be sure to configure it with the email address and password that you use to login to this site. As long as the No-IP software is properly configured and running, your hostname will always point to the dynamic IP address at your location, no matter when it changes.
If you do not wish to run a computer at all times you can see if a devices at your network supports No-IP.com for Dynamic DNS updates. Some devices that include No-IP for Dynamic DNS can be Routers or Camera systems.
Step 6: Configure Your Router
If you use a router to connect to the Internet and/or have a firewall in place on your computer, you will need to make sure that it is configured. This will direct the appropriate traffic from the Internet into the destination machine on your network. This is done using a router function called Port Forwarding. Common ports to forward are port 80 for a webserver, port 21 for FTP and port 25 for SMTP email. Only forward the ports that you absolutely need to use.
We have some basic documentation covering port forwarding and firewalls on the Support page of our site. For detailed information concerning your particular hardware or software, please consult the documentation for your equipment. We are not able to provide detailed instructions for every conceivable combination of products on the market.
In order to verify that your router and firewall are setup correctly, you can visit our website atwww.portchecktool.com.
Step 7: Run Your Services
If you have completed the step above received a successful result from the Port Check Tool website, you can now run your services and address your machine using the host or domain you created! If you run into trouble be sure to check the Support page of our website for helpful information.
For More information Pls visit. www.noip.com
Source: www.noip.com

