In this post we will learn How to Setup isolated network in hyper V (configure private network switch)
Benefits of Private networking: why we required private networking
- -if you want to create a testing in your environment without disturbing your production network like testing new windows OS and software
- -if you want to deploy communication that would required to be separate from host machine as like in clustering for heartbeat, storage that should be isolated network and many more reason you can have…….
So let’s start the configuring of Hyper V Virtual Machine networking
Prerequisites required
- Hyper V role must be install (To install Hyper V role follow this Post)
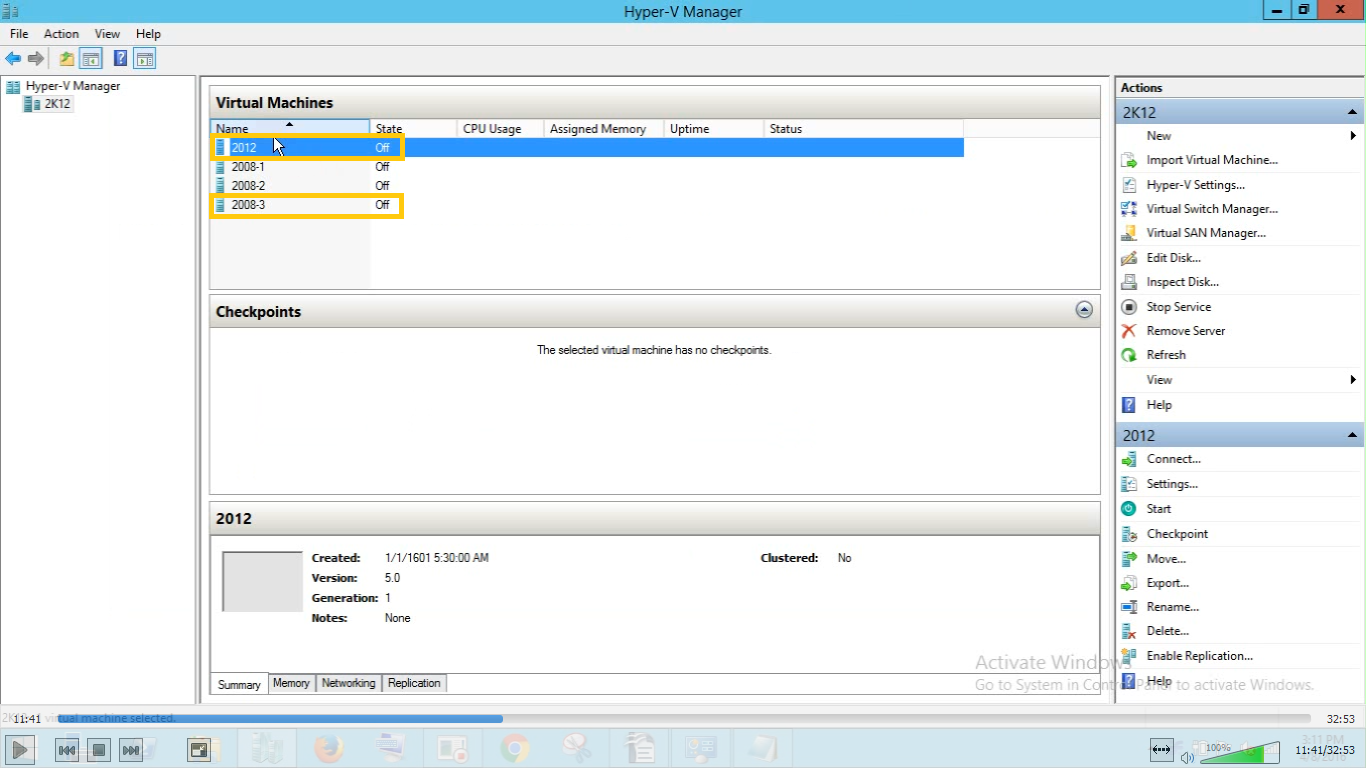
- Two VM should be installed in Hyper V manager for testing Ping communication
Scenario we have
- One New VM Server 2012 R2 (2012) installed and still it is without networking
- Another VM Server 2008 R2 (2008-3) installed
- We will use IP 20.0.0.21 and 20.0.0.22 respectively for both VMs
Steps to follow:
- Create Private Virtual Switch
- Install Add NIC Ethernet card in both VM if already not available
- Add both VMs NIC card under created private virtual switch
- IP settings and Testing
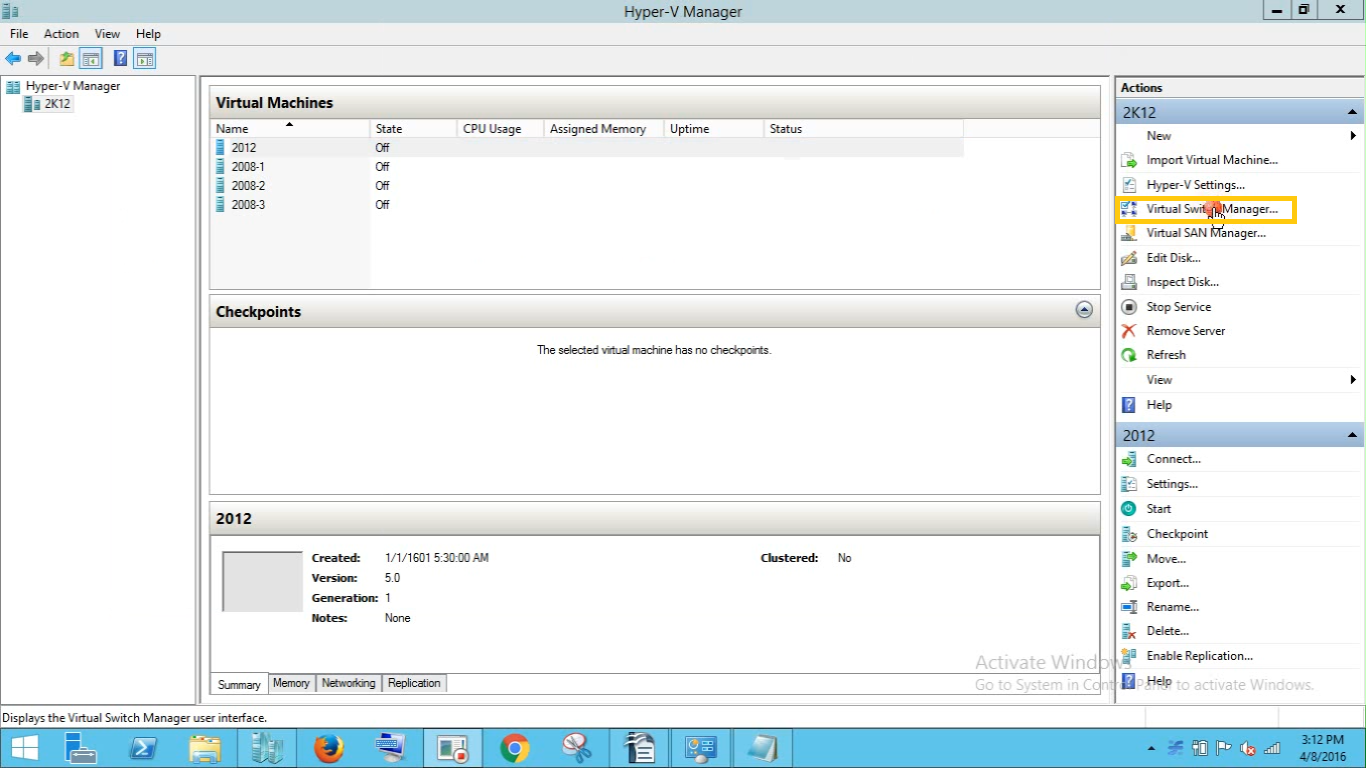
1.) We are going to create a Virtual Network Switch , now open HyperV manager click on virtual switch manager from right side pane:
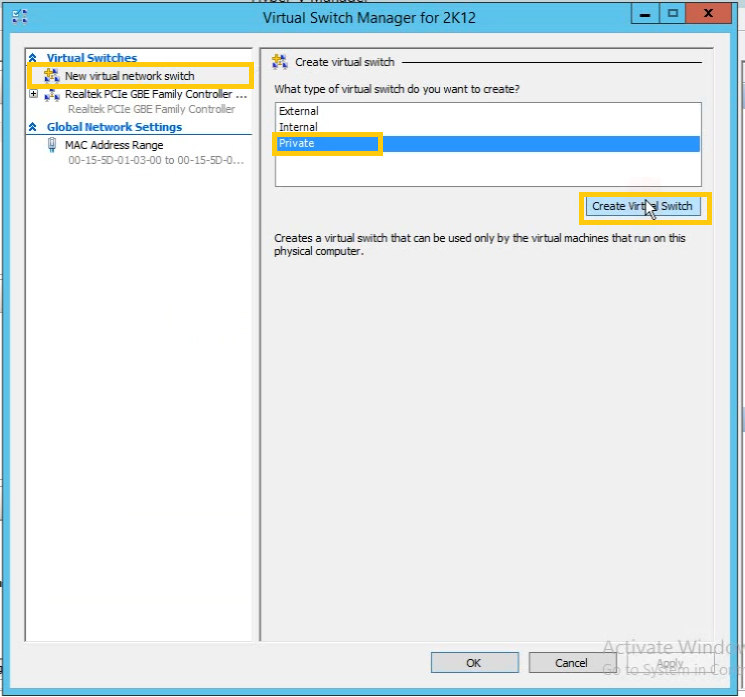
2.) From open wizard click on New virtual network switch and select Private and then click on create virtual switch
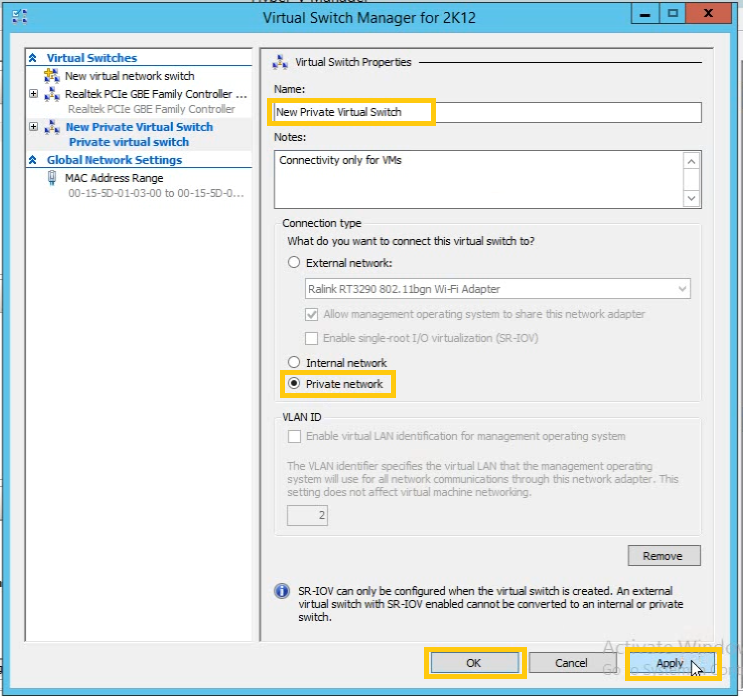
3.) In this next wizard, you need to type name of virtual machine and description that you want to keep. In connection type click on Private network radio button and then click on apply > OK.
In our example we have kept the name of this virtual switch is New Private Virtual Switch
4.) Now our First step has been completed as we have a virtual switch so now we need to create /add NIC Ethernet card in both VM if you don’t have existing network card in VMs.
As now we supposed you have not any NIC card in your VM so let’s see how to add a network adapter in VM
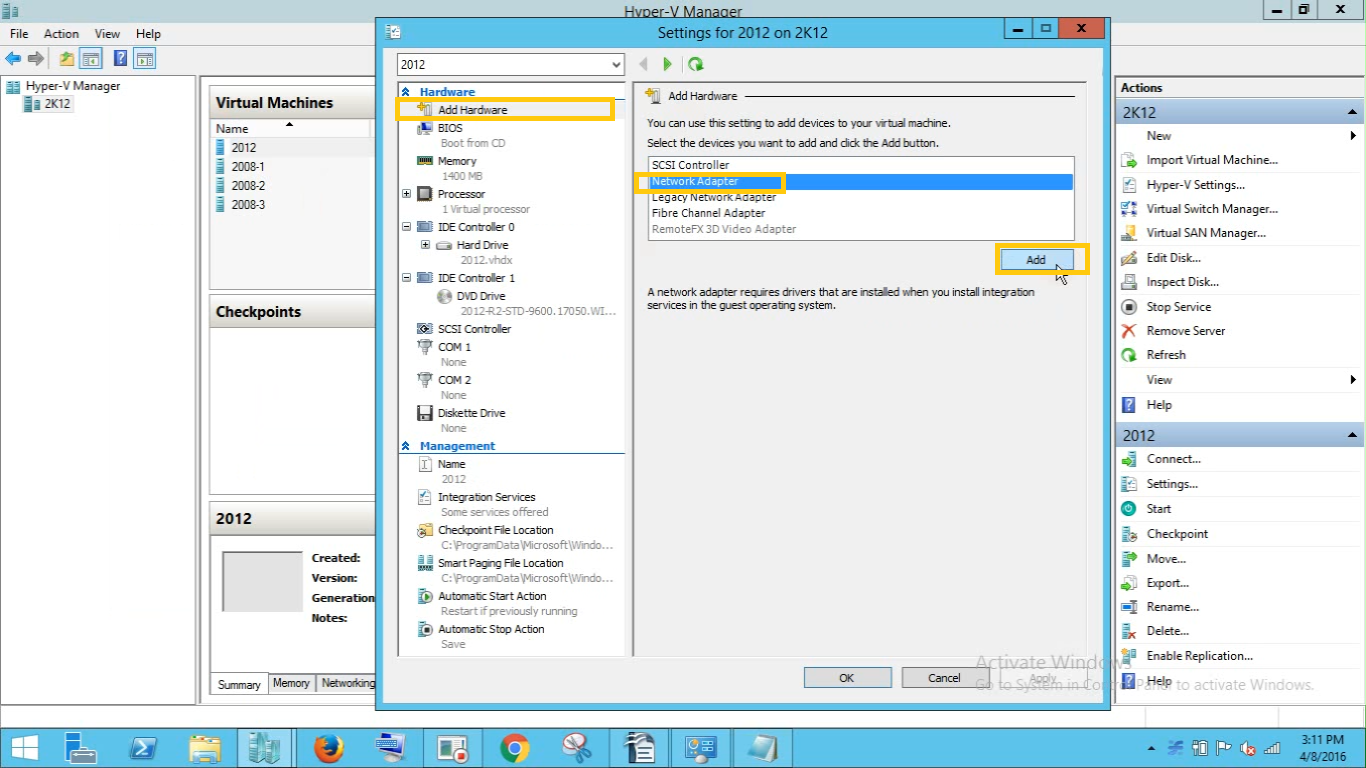
Select VM(2012) and click right and click on settings

5.) In settings box click on Add hardware > Network Adapter > click on Add then apply OK
you need to do same steps for you both VM to add NIC card
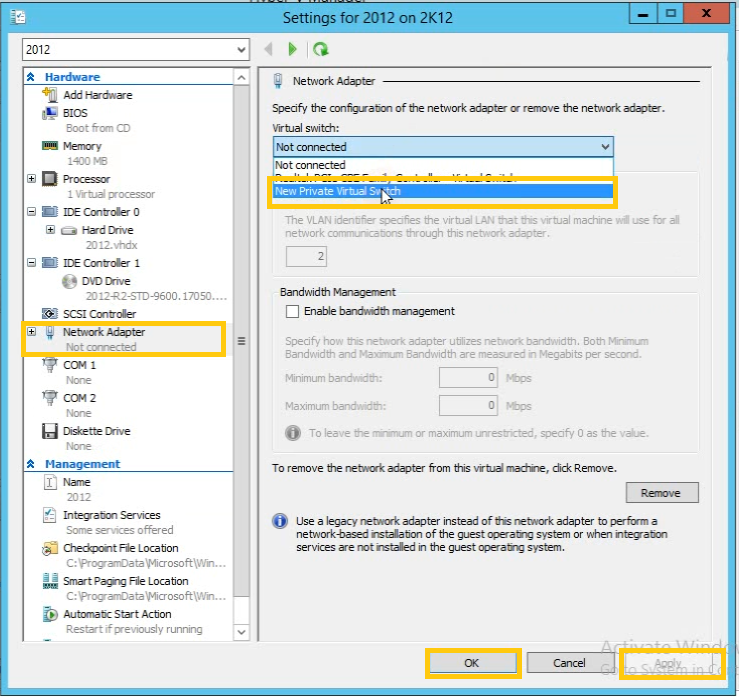
6.) After adding NIC in both VMs we need to follow third step to Connect these NIC in created new Private Virtual Switch
Now again click on Windows VM(2012) and open settings by right click. From left side pane select Network Adapter(that we have created earlier) and in virtual Switch select New Private Switch Network(the name we have given to our new virtual switch)You need to do same step for another VM (2008-3)
7.) Now the hardware setting has been completed, We have two vm and both vm has one-one nic card and that card is connected to Private Virtual Switch. So here we need to follow our final step of IP configuration and Testing
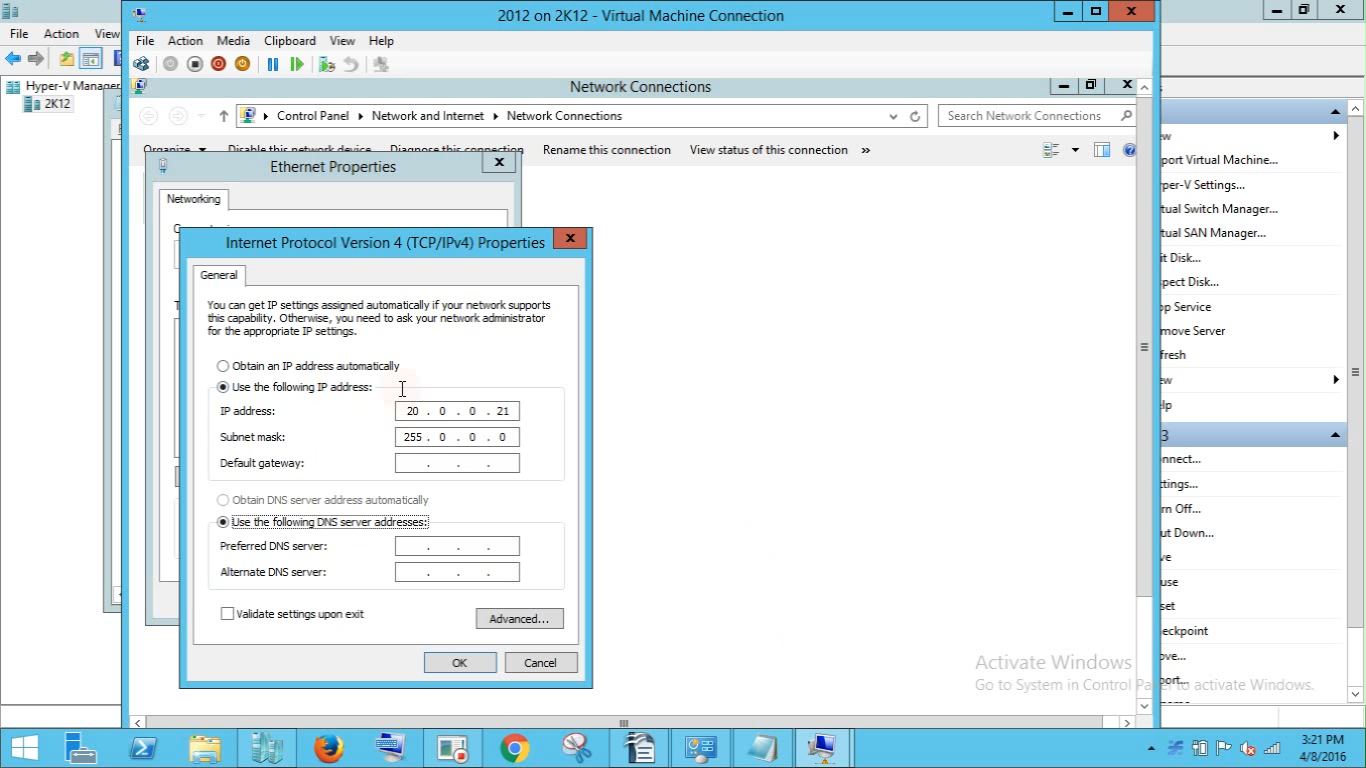
a.) Open 1st VM 2012 and confiuge IP setting as we have decided to use 20.0.0.21
Start VM and Open Control Panel > Network and Internet > Network Connections > Click on NIC adaptor properties >Provide the Ipv4 IP details as 20.0.0.21
b.) Open 2nd VM 2008-3 and confiuge IP setting as we have decided to use 20.0.0.22
Start VM and Open Control Panel > Network and Internet > Network Connections > Click on NIC adaptor properties >Provide the Ipv4 IP details as 20.0.0.22
8.) IP configuration done in both VM now we are going to test our vm as they are pinging each other or not.
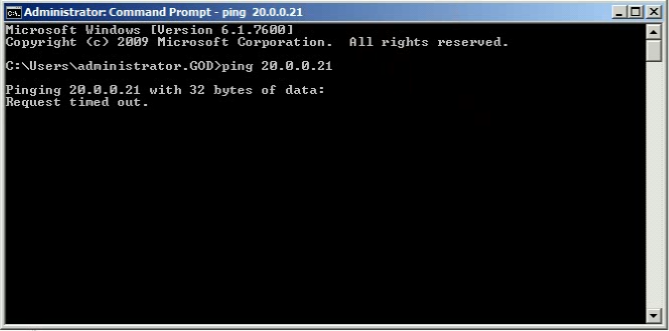
9.) As you can see we have an issue(ping issues in hyper v virtual machines) while on ping of 20.0.0.21. This is because by default VM OS has not open its ICMPv4 file and print sharing and network discovery, so we need to allow that port in both VMs windows firewall
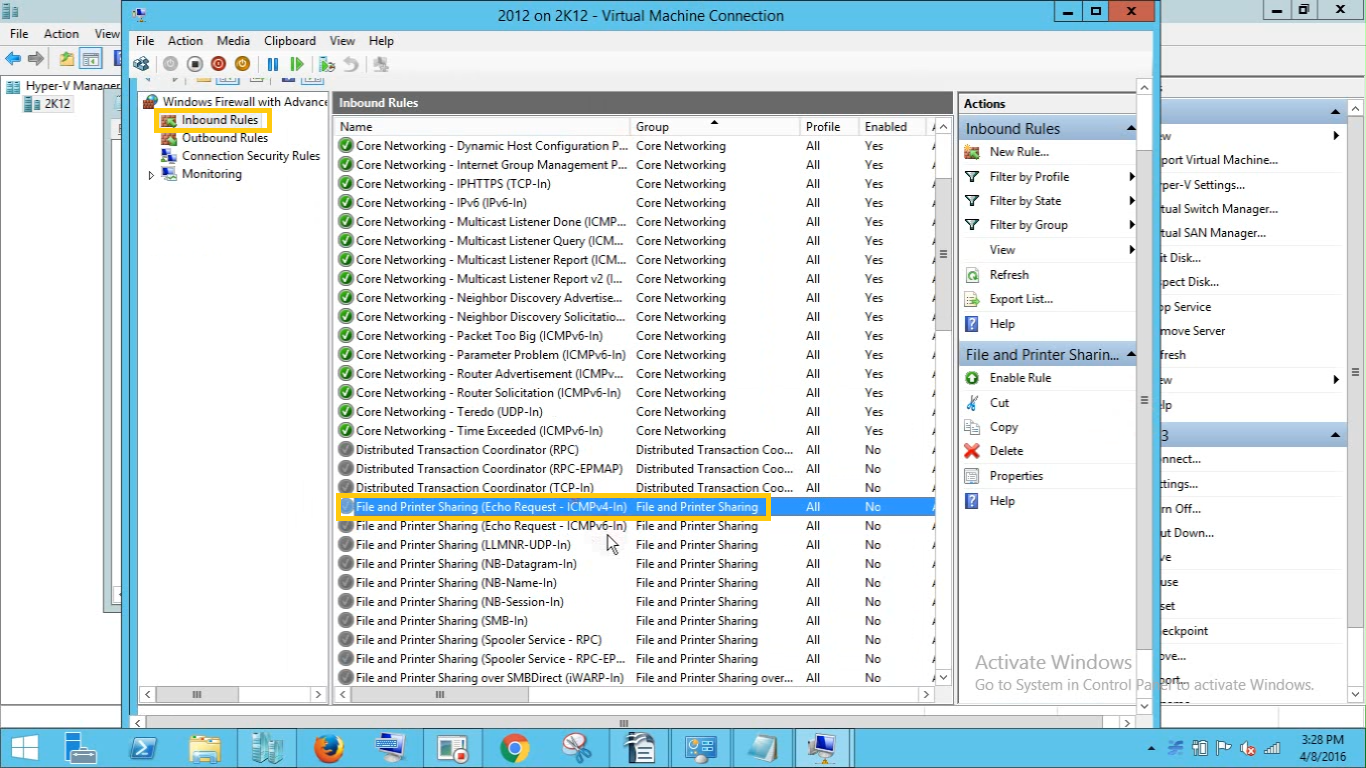
Go to Control panel or Adiministrative tools > Windows Firewall With Advance Security >
Inbound Rules > File and Printer Sharing (Echo Request – ICMPv4-In) > Right click on the rule and choose enable rule
10). Now come back to VM and test again
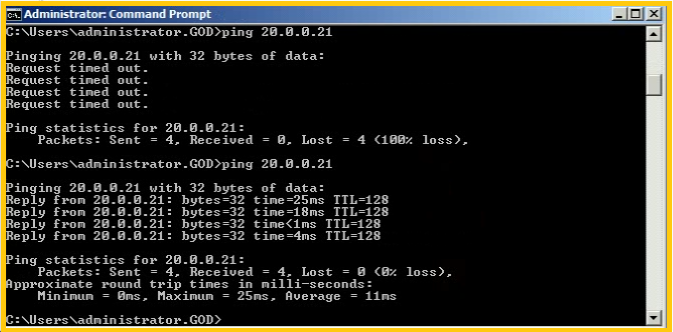
As now our ping result is successful so that’s all we have to do to make a Isolated Private Network.
Thanks for reading, Your comments and suggestions are always welcomed……:)
step by step configure hyper v networking


We have few service providers customers who are looking for such a solution. I would be happy to further discuss this.
Thanks for the walkthrough